2.0.3 | 10/1/2023
Step 1: Use Case | Step 2: Permission Set | Step 3: Define Permissions | Step 4: Manage Assignments | Step 5: Login As Users
Giving Users Permission to Mambo Merge
In the dynamic landscape of digital management, granting permissions efficiently can be the linchpin for seamless operations. Just as choreography orchestrates a dance, precise permission sets choreograph the rhythm of access and control within your Salesforce Organization. Making sure all Users can use Mambo Merge, is a critcal part to effortless Document generation.
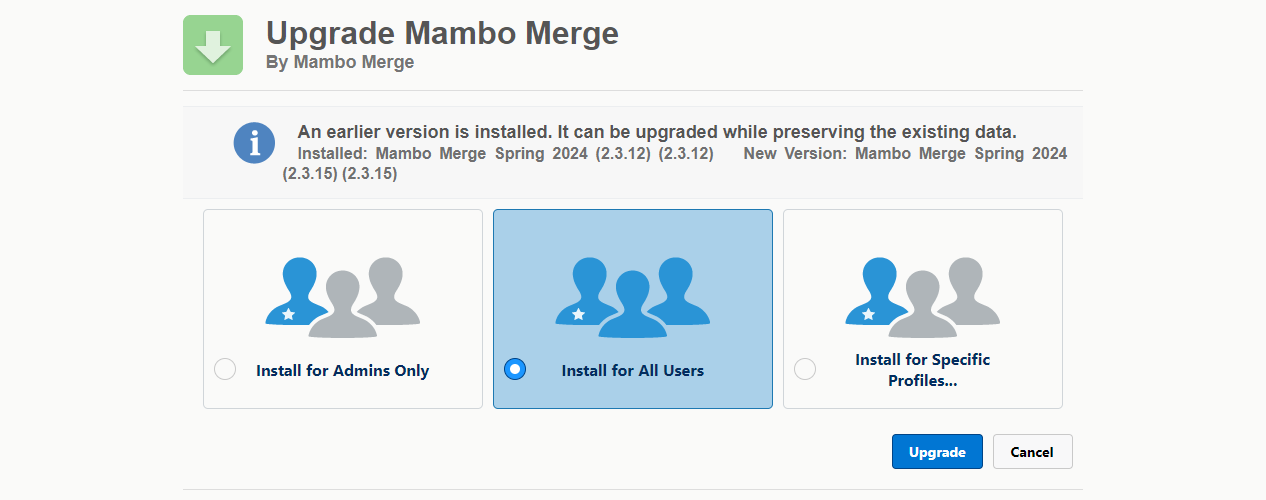
When you first install Mambo Merge to your Org, the easiest way to ensure all your Users have access to use Mambo Merge is to choose “Install for All Users”. However, whether by choice or accident occasionally some will choose “Install for Admins Only”. This will allow Mambo Merge to work for Admins who may be the once to setup your whole Mambo Merge use. The issue comes to light when having your end Users attempt to use Mambo Merge.
Administrator Notice
Admins will need to assist with the next following steps. Ensure caution when authorizing permissions to users in Salesforce, as granting inappropriate access can compromise data security and integrity. With that said, the permission sets shared here are to give Users access to the Mambo Merge component and be able to use a Mambo Merge license.
Step 1: Identify Best Use Case ↵
Though, you can easily add these permission sets directly to a user, it is more efficent to decide if a particular Profile or permission set will be best to add the permissions to. In our diretions, the focus will be with permission set as it can easily be shared to different roles and profiles in the future if needed.
Note: According to Salesforce security protocols, it is recommended to use permissions sets to assign users instead of user profiles as it will automatically grant access to anyone who falls within that profile.
Step 2: Create A New Permission Set ↵
Let us begin by creating a new permission set, here are the steps to get you started.
2.1 Head over to your org’s setup “Gear” icon and select “Setup”.

2.2 Within the “Home” tab search “Permissions Sets” and click on its search result.

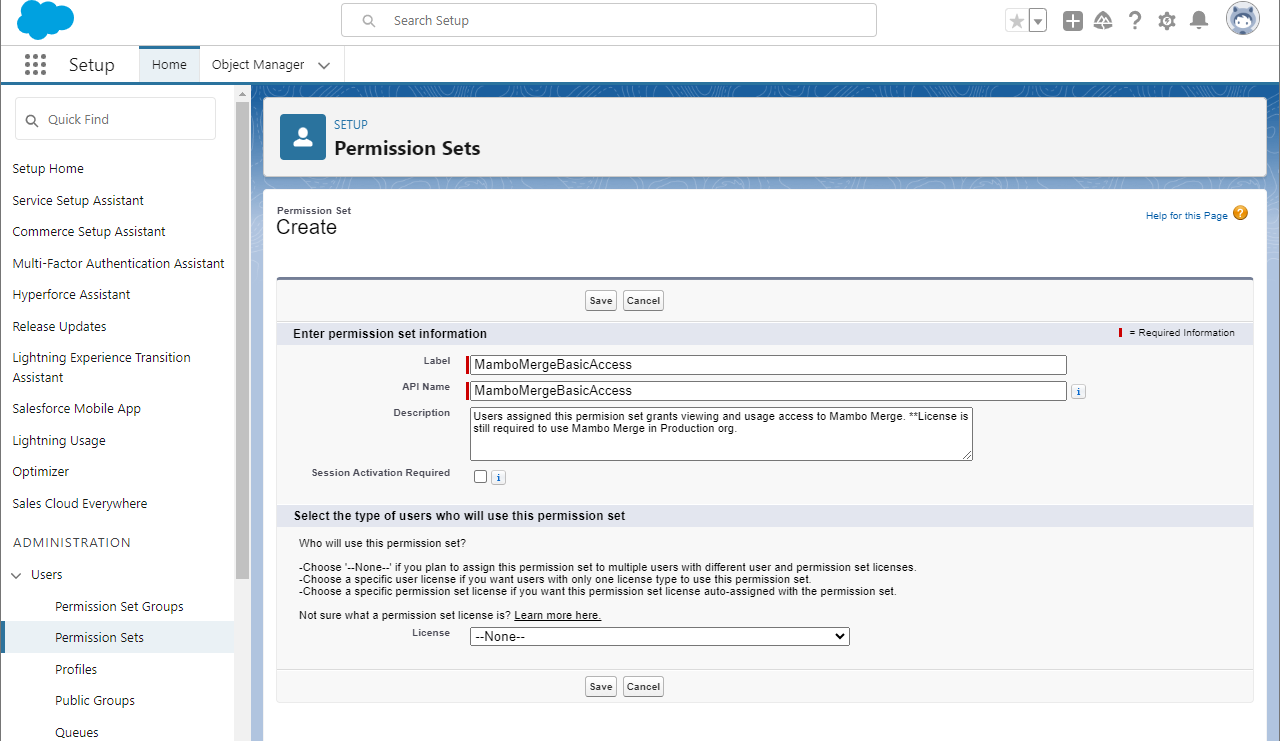
2.3 Create a new Permission set by clicking on the “New” button.

2.4 Create a “Label” for the Permission Set and provide a “description” to include more details. Once ready click on “Save”.
Note: The License type can be defined and users who will use this permission set by default or assign them individually. We decided to keep them as None, so as to be able to assign them manually later. 66d
Step 3: Define Permissions ↵
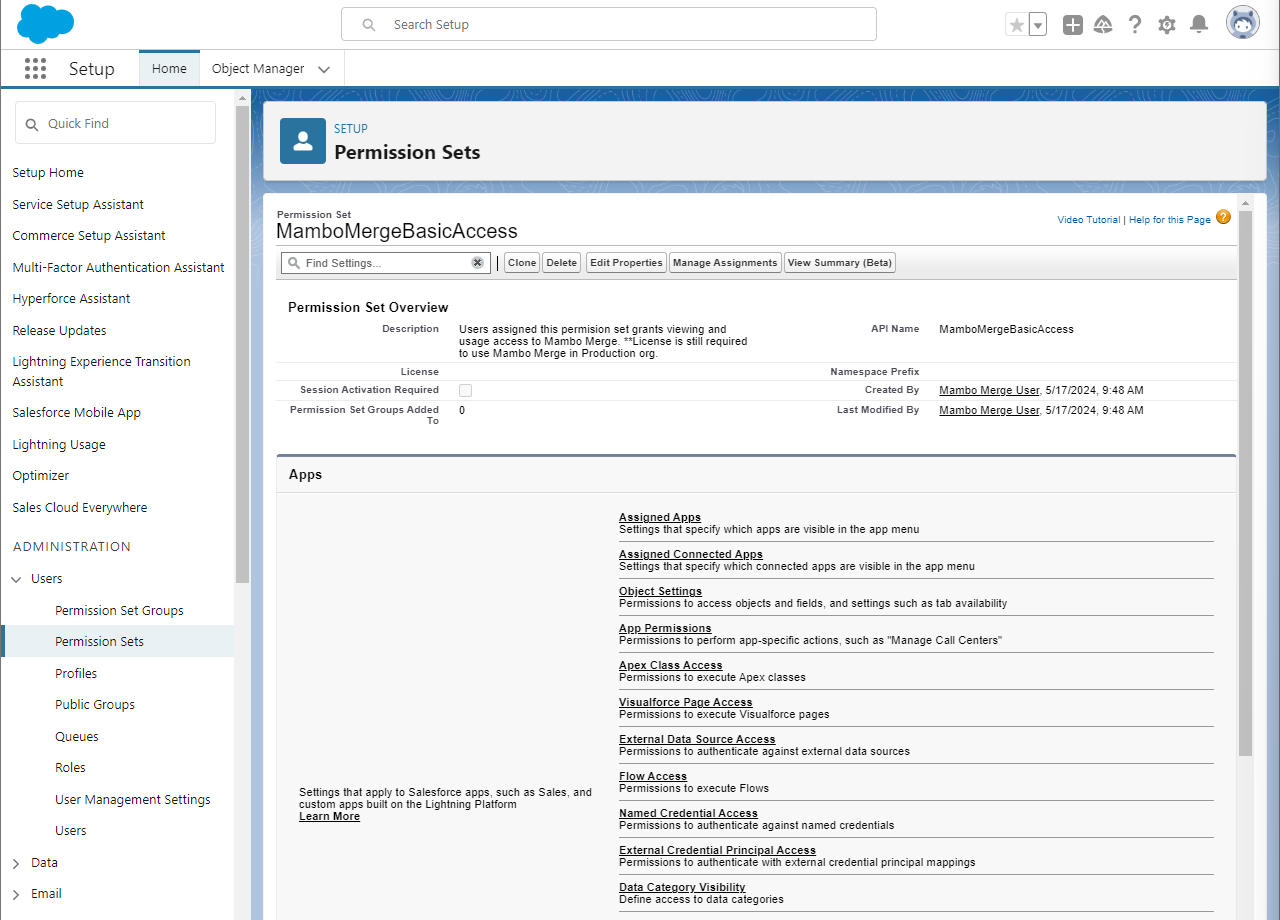
Define this permission to allow Mambo users to view and use Mambo Merge within your org(Users in your Production Org will still need a license to user Mambo Merge).
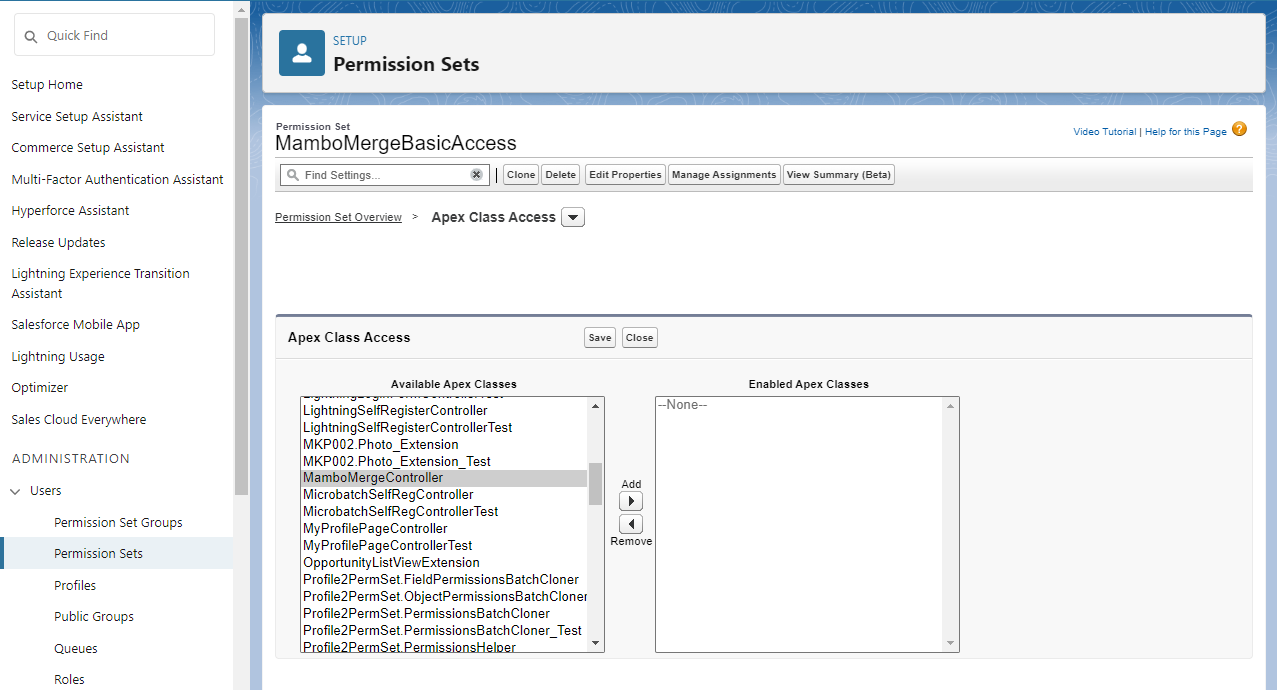
3.1 Once the permission is created scroll down the page to identify to the specific permission needed. Click on “Apex Class Access”.
3.2 On the next screen click on “Edit” to begin defining what permissions will be included within this Permission Set.
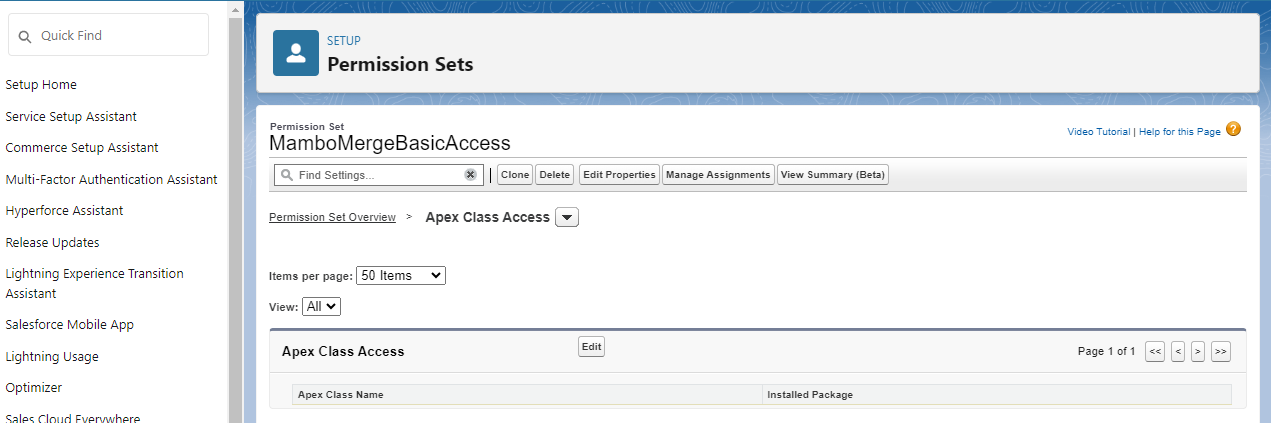
3.3 Look for “MamboMergeController” and add to Enable the Apex Class. Then, click save.
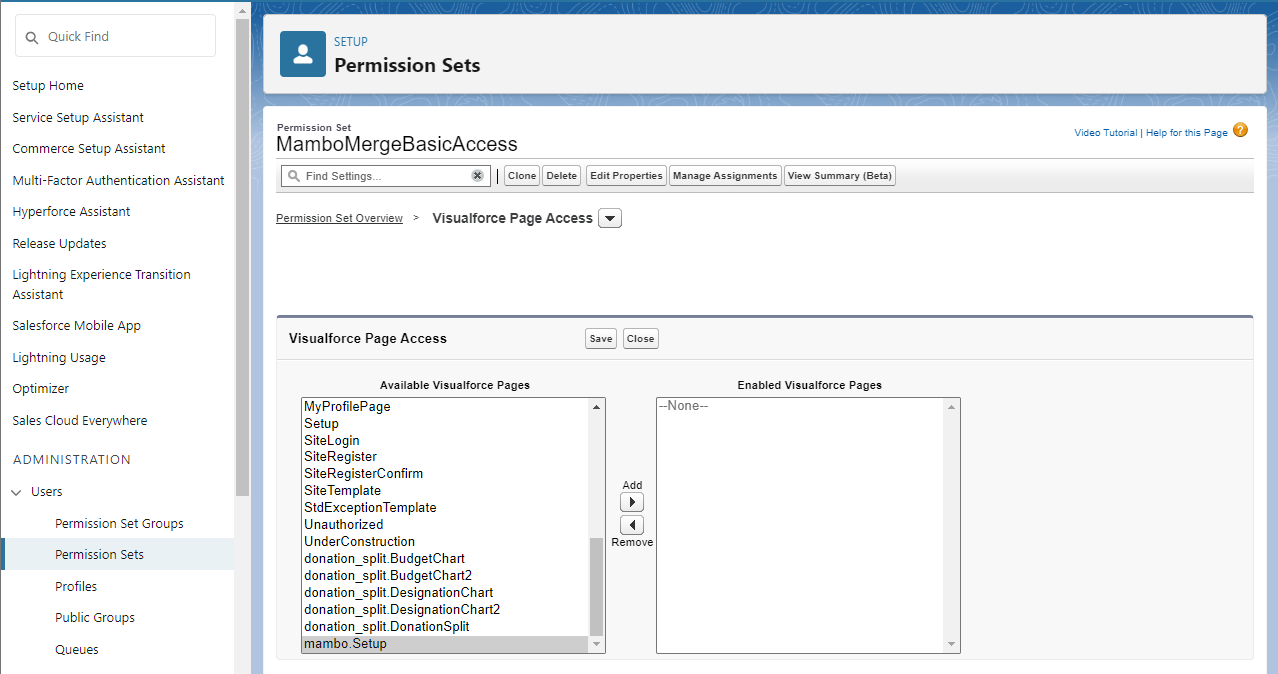
3.4 Go back to the “Permission Set Overview” Select “Visualforce Page Access”. Once again, click “Edit”.
3.5 Scroll down and look for and add “mambo.Setup”. Be sure to “Save” your changes.
Step 4: Manage Assignments ↵
Now that the permissions have been defined we can begin assigning them to those users.
4.1 Head back to the saved Permission Set and click on “Manage Assignments”.

4.2 On this next screen click on “Add Assignment” to define what users will be assigned to this Permission Set.

4.3 Select the user(s) to assign this Permission Set and click “Next”.

4.4 On this last screen, you have the option to “set an expiration date” for this permission set. By default, there is none assigned. Once ready, click on “Assign” to save.

Note: You can always adjust the expiration date by editing the assignment.
4.6 When successful, the “Current Assignments” window will now list all the users that have been assigned to this permission set.

Note: You can always repeat this step to add new users or make changes to the assignment.
Step 5: Login As User ↵
The last step is to test all the users that have been assigned to the Permission Set. Follow these steps to test each one.
5.1 Start by heading back to the “Home” tab, search “Users”, and click on its search result. Next, click on the “Login” link of an assigned user.

5.2 This will launch a new window with a banner on top letting you know that you are logged in as a selected user.

Granting access to Mambo Merge for End Users
Now, that your End Users can see Mambo Merge, don’t forget to Assign Licenses to be able to use Mambo Merge.